
Topics: Computer musical instruments, graphical user interfaces, graphics objects and widgets, event-driven programming, callback functions, Play class, continuous pitch, audio samples, MIDI sequences, paper prototyping, iterative refinement, keyboard events, mouse events, virtual piano, parallel lists, scheduling future events.
This chapter explores graphical user interfaces and the development of interactive musical instruments. Interactive computer-based musical instruments offer considerable versatility. They can be used by a single performer or by multiple performers in ensembles, like Laptop Orchestras. It is also possible to have an ensemble that includes both traditional instruments and computer-based instruments. More information is provided in the reference textbook.
Here is code from this chapter:
- Creating a Display
- Random circles on a Display
- A simple musical instrument
- An audio instrument for continuous pitch
- Changing the background color interactively
- Drawing musical circles
- Creating a virtual piano
- Creating a virtual piano – a variation
- Using Timers to schedule events
- Live coding Terry Riley’s “In C”
Creating a Display
To build programs with GUIs, you need the following statement:
from gui import *
As with the music library, the GUI library follows Alan Kay’s maxim that “simple things should be simple, and complex things should be possible”.
A program’s GUI exists inside a display (window). Displays contain other GUI components (graphics objects and widgets).
For example, this:
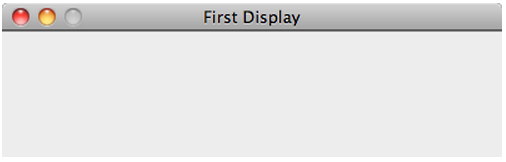
d = Display("First Display", 400, 100)
creates a display with the given title, width, and height (as shown below):
Once a display has been created, you can add GUI components as follows:
d.add(object, x, y)
where object is a GUI widget or graphics object.
A display’s origin – (0, 0) – is at the top-left corner. The coordinates x, y above specify where to place the object in the display.
For example, the following code:
from gui import *
d = Display("First Display", 400, 100)
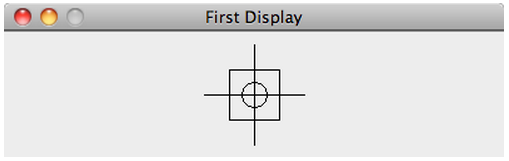
c = Circle(200, 50, 10) # x, y, and radius
d.add(c)
r = Rectangle(180, 30, 220, 70) # left-top and right-bottom corners
d.add(r)
l1 = Line(160, 50, 240, 50) # x, y of two endpoints
d.add(l1)
l2 = Line(200, 10, 200, 90)
d.add(l2)
draws the following shape:
Displays may contain any number of GUI components, but they cannot contain another display.
A program may have several displays open. Also, a program can specify where a display is placed on the screen.
Random circles on a Display
This code sample (Ch. 8, p. 246) demonstrates how to create a Display and draw random filled Circles on it. It combines some of the programming building blocks we have learned so far (namely randomness, loops, and GUI functions).
Every time you run this program, it generates 1000 random circles and places them on the created display.
Here is the code:
# randomCircles.py
#
# Demonstrates how to draw random circles on a GUI display.
#

from gui import *
from random import *

numberOfCircles = 1000    # how many circles to draw

# create display
d = Display("Random Circles", 600, 400)

# draw various filled circles with random position, radius, color
for i in range(numberOfCircles):

   # create a random circle, and place it on the display

   # get random position and radius
   x = randint(0, d.getWidth()-1)      # x may be anywhere on display
   y = randint(0, d.getHeight()-1)     # y may be anywhere on display
   radius = randint(1, 40)             # random radius (1-40 pixels)

   # get random color (RGB)
   red   = randint(0, 255)             # random R (0-255)
   green = randint(0, 255)             # random G (0-255)
   blue  = randint(0, 255)             # random B (0-255)
   color = Color(red, green, blue)     # build color from random RGB

   # create a filled circle from random values
   c = Circle(x, y, radius, color, True)

   # finally, add circle to the display
   d.add(c)

# now, all circles have been added
Here is the output:
A simple musical instrument
This code sample (Ch. 8, p. 251) demonstrates event-driven programming. It creates a GUI consisting of two buttons. The first starts a note. The second stops the note. Each button utilizes its own callback function, which performs the desired functionality, when (and if) the button is pressed.
Here is the code:
# simpleButtonInstrument.py
#
# Demonstrates how to create a instrument consisting of two buttons,
# one to start a note, and another to stop it.
#

from gui import *
from music import *

# create display
d = Display("Simple Button Instrument", 270, 130)

pitch = A4            # pitch of note to be played

# define callback functions
def startNote():   # function to start the note

   global pitch        # we use this global variable

   Play.noteOn(pitch)  # start the note

def stopNote():    # function to stop the note

   Play.allNotesOff()  # stop all notes from playing

# next, create the button widgets and assign their callback functions
b1 = Button("On", startNote)
b2 = Button("Off", stopNote)

# finally, add buttons to the display
d.add(b1, 90, 30)
d.add(b2, 90, 65)
Here is a demo of interacting with this program:
An audio instrument for continuous pitch
This code sample (Ch. 8, p. 256) demonstrates how to use GUI components to create a simple instrument for changing the volume and frequency of an audio loop in real time.
Here is the program. It uses an audio sample from Moondog’s Lament I, “Bird’s Lament”. You should save moondog.Bird_sLament.wav in the same folder as the program, prior to running it.
# continuousPitchInstrumentAudio.py
#
# Demonstrates how to use sliders and labels to create an instrument
# for changing volume and frequency of an audio loop in real time.
#

from gui import *
from music import *

# load audio sample
a = AudioSample("moondog.Bird_sLament.wav")

# create display
d = Display("Continuous Pitch Instrument", 270, 200)

# set slider ranges (must be integers)
minFreq = 440   # frequency slider range
maxFreq = 880   # (440 Hz is A4, 880 Hz is A5)

minVol = 0      # volume slider range
maxVol = 127

# create labels
label1 = Label( "Freq: " + str(minFreq) + " Hz" )  # set initial text
label2 = Label( "Vol: " + str(maxVol) )

# define callback functions (called every time the slider changes)
def setFrequency(freq):   # function to change frequency

   global label1, a           # label to update, and audio to adjust

   a.setFrequency(freq)
   label1.setText("Freq: " + str(freq) + " Hz")  # update label

def setVolume(volume):    # function to change volume

   global label2, a           # label to update, and audio to adjust

   a.setVolume(volume)
   label2.setText("Vol: " + str(volume))  # update label

# next, create two slider widgets and assign their callback functions
#Slider(orientation, lower, upper, start, eventHandler)
slider1 = Slider(HORIZONTAL, minFreq, maxFreq, minFreq, setFrequency)
slider2 = Slider(HORIZONTAL, minVol, maxVol, maxVol, setVolume)

# add labels and sliders to display
d.add(label1, 40, 30)
d.add(slider1, 40, 60)
d.add(label2, 40, 120)
d.add(slider2, 40, 150)

# start the sound
a.loop()
Here is a demo of interacting with this program:
Changing the background color interactively
This code sample demonstrates how to use sliders to update values in real time. It creates a GUI consisting of three Slider and several Label widgets. The sliders control the color of the Display by updating its RGB values. Similar code can be written to control any type of useful parameters.
Here is the code:
# RGB_Display.py
#
# Demonstrates how to use sliders to update values in real time (here, the
# background color of the display).  It also uses labels to provide additional
# feedback and visibility (by showing updated RGB values).
#

from gui import *

# create display
d = Display("RGB Display", 600, 400)

# initialize RGB values (0-255)
red   = 255
green = 255
blue  = 255

# initialize display background to these RGB values
d.setColor( Color(red, green, blue) )

# create labels for the sliders with black text and white background
labelRed   = Label(" R ", CENTER, Color.BLACK, Color.WHITE)
labelGreen = Label(" G ", CENTER, Color.BLACK, Color.WHITE)
labelBlue  = Label(" B ", CENTER, Color.BLACK, Color.WHITE)

# add labels to display
d.add(labelRed,   180, 132)
d.add(labelGreen, 180, 182)
d.add(labelBlue,  180, 232)

# create labels for the sliders' values with black text and white background
labelRedValue   = Label(" " + str(red) + " ",   CENTER, Color.BLACK, Color.WHITE)
labelGreenValue = Label(" " + str(green) + " ", CENTER, Color.BLACK, Color.WHITE)
labelBlueValue  = Label(" " + str(blue) + " ",  CENTER, Color.BLACK, Color.WHITE)

# add labels for values to display
d.add(labelRedValue,   400, 132)
d.add(labelGreenValue, 400, 182)
d.add(labelBlueValue,  400, 232)

# define function to update red value
def setRed(value):
   global d, red, green, blue, labelRedValue

   red = value                                 # update red value
   labelRedValue.setText(" " + str(red) + " ") # update red value label
   d.setColor(Color(red, green, blue))         # update background color

# define function to update green value
def setGreen(value):
   global d, red, green, blue, labelGreenValue

   green = value                                   # update green value
   labelGreenValue.setText(" " + str(green) + " ") # update green value label
   d.setColor(Color(red, green, blue))             # set background color

# define function to update blue value
def setBlue(value):
   global d, red, green, blue, labelBlueValue

   blue = value                                  # update blue value
   labelBlueValue.setText(" " + str(blue) + " ") # update blue value label
   d.setColor(Color(red, green, blue))           # set background color

# create sliders to set red, green, and blue values, respectively
sliderRed   = Slider(HORIZONTAL, 0, 255, red, setRed)
sliderGreen = Slider(HORIZONTAL, 0, 255, green, setGreen)
sliderBlue  = Slider(HORIZONTAL, 0, 255, blue, setBlue)

# add sliders to display
d.add(sliderRed,   200, 125)
d.add(sliderGreen, 200, 175)
d.add(sliderBlue,  200, 225)
Here is a demo of interacting with this program:
This example was contributed by Mallory Rourk.
Drawing musical circles
This code sample (Ch. 8, p. 268) demonstrates how to use event handling to build an interactive musical instrument. In this simple example, the user plays notes by drawing circles.
Here is the code:
# simpleCircleInstrument.py
#
# Demonstrates how to use mouse and keyboard events to build a simple
# drawing musical instrument.
#

from gui import *
from music import *
from math import sqrt

### initialize variables ######################
minPitch = C1  # instrument pitch range
maxPitch = C8

# create display
d = Display("Circle Instrument")    # default dimensions (600 x 400)
d.setColor( Color(51, 204, 255) )   # set background to turquoise

beginX = 0   # holds starting x coordinate for next circle
beginY = 0   # holds starting y coordinate

# maximum circle diameter - same as diagonal of display
maxDiameter = sqrt(d.getWidth()**2 + d.getHeight()**2) # calculate it

### define callback functions ######################
def beginCircle(x, y):   # for when mouse is pressed

   global beginX, beginY

   beginX = x   # remember new circle's coordinates
   beginY = y

def endCircleAndPlayNote(endX, endY):  # for when mouse is released

   global beginX, beginY, d, maxDiameter, minPitch, maxPitch

   # calculate circle parameters
   # first, calculate distance between begin and end points
   diameter = sqrt( (beginX-endX)**2 + (beginY-endY)**2 )
   diameter = int(diameter)      # in pixels - make it an integer
   radius   = diameter/2         # get radius
   centerX  = (beginX + endX)/2  # circle center is halfway between...
   centerY  = (beginY + endY)/2  # ...begin and end points

   # draw circle with yellow color, unfilled, 3 pixels thick
   d.drawCircle(centerX, centerY, radius, Color.YELLOW, False, 3)

   # create note
   pitch = mapScale(diameter, 0, maxDiameter, minPitch, maxPitch,
                    MAJOR_SCALE)

   # invert pitch (larger diameter, lower pitch)
   pitch = maxPitch - pitch

   # and play note
   Play.note(pitch, 0, 5000)   # start immediately, hold for 5 secs

def clearOnSpacebar(key):  # for when a key is pressed

  global d

  # if they pressed space, clear display and stop the music
  if key == VK_SPACE:
     d.removeAll()        # remove all shapes
     Play.allNotesOff()   # stop all notes

### assign callback functions to display event handlers #############
d.onMouseDown( beginCircle )
d.onMouseUp( endCircleAndPlayNote )
d.onKeyDown( clearOnSpacebar )
Here is a demo of interacting with this program:
Creating a virtual piano
This code sample (Ch. 8, p. 274) demonstrates how to create an interactive musical instrument that incorporates images. The following program combines GUI elements to create a realistic piano which can be played through the computer keyboard.
It associates the keys “Z”, “S”, and “X”, on your computer keyboard, with the first three GUI piano keys, respectively. In other words, you play the GUI piano via your computer keyboard (seeing which keys are pressed).
The program loads an image of a complete piano octave, i.e., iPianoOctave.png, to display a piano keyboard with 12 keys unpressed. Then, to generate the illusion of piano keys being pressed, it selectively adds the following images to the display:
- iPianoWhiteLeftDown.png (used for “pressing” keys C and F),
- iPianoBlackDown.png (used for “pressing” any black key),
- iPianoWhiteCenterDown.png (used for “pressing” keys D, G and A), and
- iPianoWhiteRightDown.png (used for “pressing” keys E and B).
The above images have to be saved in your jythonMusic folder, prior to running this program.
Here is code:
# iPianoSimple.py
#
# Demonstrates how to build a simple piano instrument playable
# through the computer keyboard.
#

from music import *
from gui import *

Play.setInstrument(PIANO)   # set desired MIDI instrument (0-127)

# load piano image and create display with appropriate size
pianoIcon = Icon("iPianoOctave.png")     # image for complete piano
display   = Display("iPiano", pianoIcon.getWidth(),
                              pianoIcon.getHeight())
display.add(pianoIcon)       # place image at top-left corner

# load icons for pressed piano keys
cDownIcon      = Icon("iPianoWhiteLeftDown.png")    # C
cSharpDownIcon = Icon("iPianoBlackDown.png")        # C sharp
dDownIcon      = Icon("iPianoWhiteCenterDown.png")  # D
# ...continue loading icons for additional piano keys

# remember which keys are currently pressed
keysPressed = []

#####################################################################
# define callback functions
def beginNote(key):
   """This function will be called when a computer key is pressed.
      It starts the corresponding note, if the key is pressed for
      the first time (i.e., counteracts the key-repeat function of
      computer keyboards).
   """

   global display      # display surface to add icons
   global keysPressed  # list to remember which keys are pressed

   print "Key pressed is " + str(key)   # show which key was pressed

   if key == VK_Z and key not in keysPressed:
      display.add( cDownIcon, 0, 1 )  # "press" this piano key
      Play.noteOn( C4 )               # play corresponding note
      keysPressed.append( VK_Z )      # avoid key-repeat

   elif key == VK_S and key not in keysPressed:
      display.add( cSharpDownIcon, 45, 1 )  # "press" this piano key
      Play.noteOn( CS4 )                    # play corresponding note
      keysPressed.append( VK_S )            # avoid key-repeat

   elif key == VK_X and key not in keysPressed:
      display.add( dDownIcon, 76, 1 )  # "press" this piano key
      Play.noteOn( D4 )                # play corresponding note
      keysPressed.append( VK_X )       # avoid key-repeat

   # ...continue adding elif's for additional piano keys

def endNote(key):
   """This function will be called when a computer key is released.
      It stops the corresponding note.
   """

   global display      # display surface to add icons
   global keysPressed  # list to remember which keys are pressed

   if key == VK_Z:
      display.remove( cDownIcon )  # "release" this piano key
      Play.noteOff( C4 )           # stop corresponding note
      keysPressed.remove( VK_Z )   # and forget key

   elif key == VK_S:
      display.remove( cSharpDownIcon )  # "release" this piano key
      Play.noteOff( CS4 )               # stop corresponding note
      keysPressed.remove( VK_S )        # and forget key

   elif key == VK_X:
      display.remove( dDownIcon )  # "release" this piano key
      Play.noteOff( D4 )           # stop corresponding note
      keysPressed.remove( VK_X )   # and forget key

   # ...continue adding elif's for additional piano keys

#####################################################################
# associate callback functions with GUI events
display.onKeyDown( beginNote )
display.onKeyUp( endNote )
Here is a demo of interacting with this program:
Creating a virtual piano – a variation
This code sample (Ch. 8, p. 279) demonstrates how to perform the same (above) task using parallel lists for coding economy.
Here is the code:
# iPianoParallel.py
#
# Demonstrates how to build a simple piano instrument playable
# through the computer keyboard.
#

from music import *
from gui import *

Play.setInstrument(PIANO)   # set desired MIDI instrument (0-127)

# load piano image and create display with appropriate size
pianoIcon = Icon("iPianoOctave.png")     # image for complete piano
d = Display("iPiano", pianoIcon.getWidth(), pianoIcon.getHeight())
d.add(pianoIcon)       # place image at top-left corner

# NOTE: The following loads a partial list of icons for pressed piano
#       keys, and associates them (via parallel lists) with the
# virtual keys corresponding to those piano keys and the corresponding
# pitches.  These lists should be expanded to cover the whole octave
# (or more).

# load icons for pressed piano keys
# (continue loading icons for additional piano keys)
downKeyIcons = []    # holds all down piano-key icons
downKeyIcons.append( Icon("iPianoWhiteLeftDown.png") )   # C
downKeyIcons.append( Icon("iPianoBlackDown.png") )       # C sharp
downKeyIcons.append( Icon("iPianoWhiteCenterDown.png") ) # D
downKeyIcons.append( Icon("iPianoBlackDown.png") )       # D sharp
downKeyIcons.append( Icon("iPianoWhiteRightDown.png") )  # E
downKeyIcons.append( Icon("iPianoWhiteLeftDown.png") )   # F

# lists of virtual keys and pitches corresponding to above piano keys
virtualKeys = [VK_Z, VK_S, VK_X, VK_D, VK_C, VK_V]
pitches     = [C4,   CS4,  D4,   DS4,  E4,   F4]

# create list of display positions for downKey icons
#
# NOTE:  This as hardcoded - they depend on the used images!
#
iconLeftXCoordinates = [0, 45, 76, 138, 150, 223]

keysPressed = []   # holds which keys are currently pressed

#####################################################################
# define callback functions
def beginNote( key ):
   """Called when a computer key is pressed.  Implements the
      corresponding piano key press (i.e., adds key-down icon on
      display, and starts note).  Also, counteracts the key-repeat
      function of computer keyboards.
   """

   # loop through all known virtual keys
   for i in range( len(virtualKeys) ):

      # if this is a known key (and NOT already pressed)
      if key == virtualKeys[i] and key not in keysPressed:

         # "press" this piano key (by adding pressed key icon)
         d.add( downKeyIcons[i], iconLeftXCoordinates[i], 0 )
         Play.noteOn( pitches[i] )    # play corresponding note
         keysPressed.append( key )    # avoid key-repeat

def endNote( key ):
   """Called when a computer key is released.  Implements the
      corresponding piano key release (i.e., removes key-down icon,
      and stops note).
   """

   # loop through known virtual keys
   for i in range( len(virtualKeys) ):

      # if this is a known key (we can assume it is already pressed)
      if key == virtualKeys[i]:

         # "release" this piano key (by removing pressed key icon)
         d.remove( downKeyIcons[i] )
         Play.noteOff( pitches[i] )    # stop corresponding note
         keysPressed.remove( key )     # and forget key

#####################################################################
# associate callback functions with GUI events
d.onKeyDown( beginNote )
d.onKeyUp( endNote )
Using Timers to schedule events
This code sample (Ch. 8, p. 283) demonstrates how to use timers to control a generative music system. This example is inspired by Brian Eno’s “Bloom” musical app for smartphones.
This program also demonstrates how to use a secondary display, in this case with a Slider, to control actions on the primary display.
Here is the code:
# randomCirclesTimed.py
#
# Demonstrates how to generate a musical animation by drawing random
# circles on a GUI display using a timer.  Each circle generates
# a note - the redder the color, the lower the pitch; also,
# the larger the radius, the louder the note.  Note pitches come
# from the major scale.
#

from gui import *
from random import *
from music import *

delay = 500   # initial delay between successive circle/notes

##### create display on which to draw circles #####
d = Display("Random Timed Circles with Sound")

# define callback function for timer
def drawCircle():
   """Draws one random circle and plays the corresponding note."""

   global d                            # we will access the display

   x      = randint(0, d.getWidth())   # x may be anywhere on display
   y      = randint(0, d.getHeight())  # y may be anywhere on display
   radius = randint(5, 40)             # random radius (5-40 pixels)

   # create a red-to-brown-to-blue gradient (RGB)
   red   = randint(100, 255)           # random R component (100-255)
   blue  = randint(0, 100)             # random B component (0-100)
   color = Color(red, 0, blue)         # create color (green is 0)
   c     = Circle(x, y, radius, color, True)  # create filled circle
   d.add(c)                            # add it to the display

   # now, let's create note based on this circle

   # the redder the color, the lower the pitch (using major scale)
   pitch = mapScale(255-red+blue, 0, 255, C4, C6, MAJOR_SCALE)

   # the larger the circle, the louder the note
   dynamic = mapValue(radius, 5, 40, 20, 127)

   # and play note (start immediately, hold for 5 secs)
   Play.note(pitch, 0, 5000, dynamic)

# create timer for animation
t = Timer(delay, drawCircle)    # one circle per 'delay' milliseconds

##### create display with slider for user input #####
title = "Delay"
xPosition = d.getWidth() / 3    # set initial position of display
yPosition = d.getHeight() + 45
d1 = Display(title, 250, 50, xPosition, yPosition)

# define callback function for slider
def timerSet(value):
   global t, d1, title   # we will access these variables
   t.setDelay(value)
   d1.setTitle(title + " (" + str(value) + " msec)")

# create slider
s1 = Slider(HORIZONTAL, 10, delay*2, delay, timerSet)
d1.add(s1, 25, 10)

# everything is ready, so start animation (i.e., start timer)
t.start()
Here is the output:
We will see timers again used in chapter 10 for animation.
Live coding Terry Riley’s “In C”
Live coding is a music performance practice where performers code live (in front of an audience), and change portions of a running program on the fly to affect the musical output being produced. Live coding is particularly popular in Europe and Australia, with a growing presence in the US.
The following code sample demonstrates how to perform Terry Riley’s “In C” using live coding. JEM supports live coding by allowing you to make changes and re-execute portions of a running program (see JEM’s “Run” menu).
Performance Instructions
Each performer should do the following:
- Run code below.
- While code is running in JEM:
- update lines 10 and 11 to contain the next musical pattern
- when ready, press
- On Mac: Shift-Command-P
- On Windows (or Linux): Shift-CTRL-P
This executes only lines 10 and 11, and updates the music being played.
Here is the code:
# TerryRiley.InC.py
#
# Live coding performance of Terry Riley's "In C".
# See http://www.flagmusic.com/content/clips/inc.pdf

from music import *
from timer import *

# redefine these notes at will
pitches   = [E4, F4, E4]
durations = [SN, SN, EN]

# play above pitches and durations in a continuous loop
def loopMusic():

   global pitches, durations

   # create phrase from current pitches and durations
   theme = Phrase()
   theme.addNoteList( pitches, durations )

   # play it
   Play.midi( theme )

   # get duration of phrase in millisecs (assume 60BPM)
   duration = int( theme.getBeatLength() * 1000 )

   # create and start timer to call this function
   # once recursively, after the elapsed duration
   t = Timer( duration, loopMusic, [], False )
   t.start()

# start playing
loopMusic()
Here is a live performance by a university laptop orchestra:
Temporal Recursion
The above code demonstrates an advanced technique, called temporal recursion (see lines 30-31). Temporal recursion was invented by Andrew Sorensen specifically for live coding.
We will see more on recursion in chapter 11.
